How to apply cluster lashes? Let me walk you through the exact process I use now. This isn't theoretical — it's what I do at my bathroom mirror most mornings, refined over many, many crooked-cluster disasters.
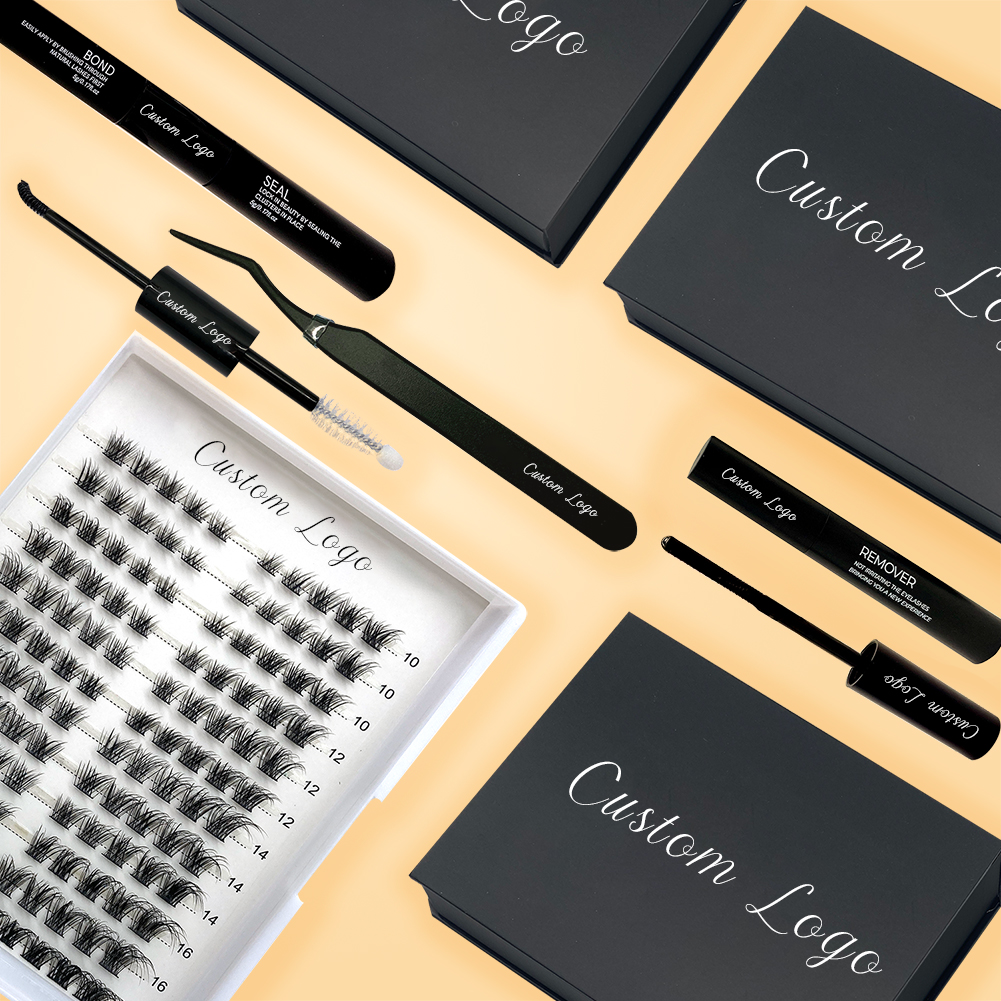
Before we start: you only need three things in your diy lash extension kit. Not twelve. Not the $80 starter box. Three.
A quality bond and seal lash glue, diy lash clusters, a pair of precision lash tweezers.
That's it. Don't let product listings convince you that you need five types of glue, a special applicator wand, and a magnetic lash palette. You don't.
Ready to build your cluster lash kit without the fluff? Check out our curated diy lash essentials →
For the best hold, I prefer using long lasting lash bond and seal that stays flexible.
Soft PBT cluster lashes tend to blend more naturally with real lashes than heavier synthetic fibers.
Curl Your Natural Lashes First
I skipped this step for months. Big mistake. When your natural lashes point downward and you stick a curved cluster on top, you get that telltale layered look — natural lashes going one direction, false lashes going another. It's the number one giveaway that you're wearing falsies.
Take ten seconds with an eyelash curler before you touch any glue. Give your natural lashes an upward curve that matches the shape of the clusters you're about to apply. This single step makes the blending process infinitely easier.
Prep Your Glue — And Wait for Tacky
This is the step that separates cluster lashes that last all day from the ones sliding off by noon.
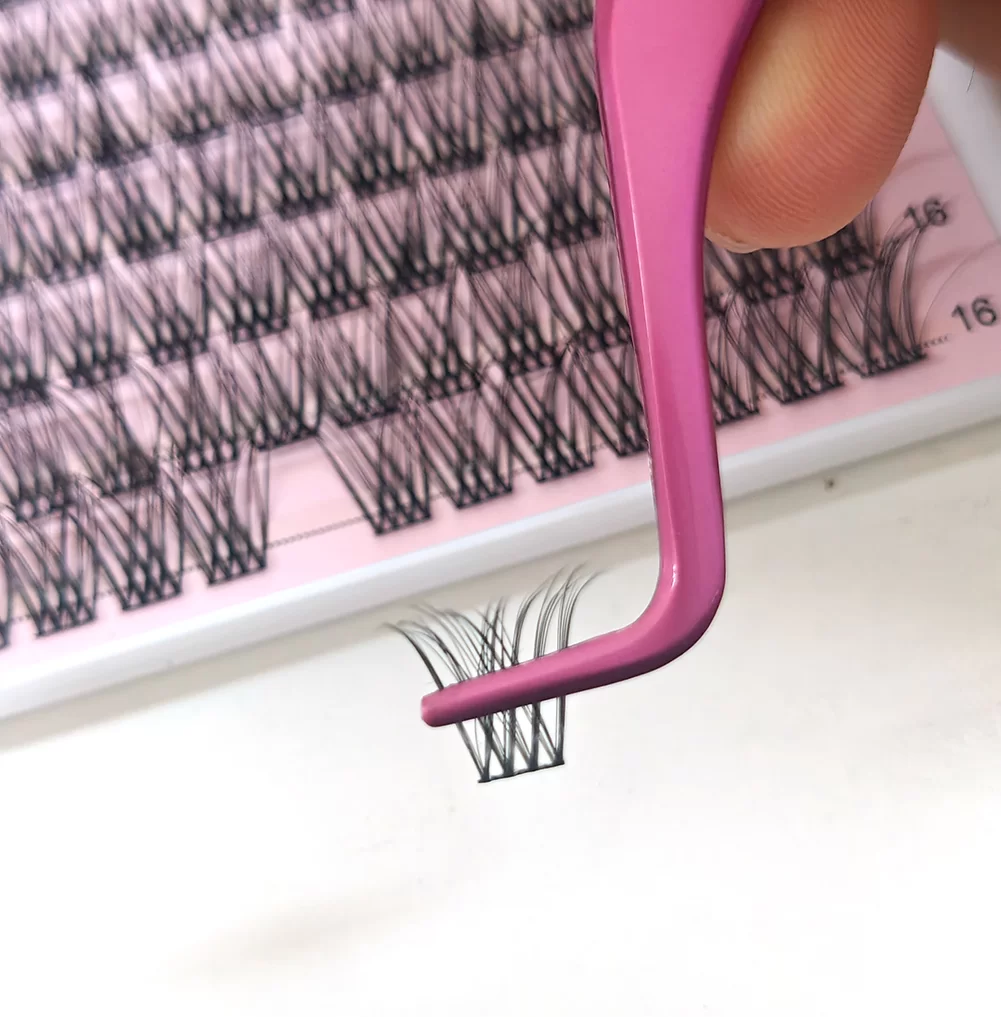
Pick up your cluster from the lower-middle section with your tweezers (not the tip — the lower middle gives you the most control). Dip just the base of the band with the lash bond. Then — and this is the part people skip — wait 3 to 5 seconds.
Fresh lash bond is wet and slippery. Appling while it's in this state, the cluster slides around on your lash line and won't grip. After a few seconds, the glue changes texture: it becomes tacky and slightly translucent. That tackiness is what creates a grip. When you place a cluster with tacky glue, it sticks on contact and holds its position. When you place it with wet glue, it drifts.
The first time I actually waited for the glue to turn tacky, my application time dropped from fifteen minutes to seven. Not because I got faster, but because I stopped having to reposition clusters that had slid out of place.
Apply in the Right Order — Center First
Start at the center of your lash line — directly above your pupil. This anchor cluster sets the baseline for everything else. Once the center is in place, fill in toward the inner corner, then the outer corner.
Place each lash cluster on top of your natural lash roots, not on bare skin. Skin application looks obvious and doesn't hold — there's nothing for the cluster to anchor to among your natural lashes. The cluster should rest on and among your natural lash base. That's what makes it blend.
Two density options:
For a natural look: leave a small gap between each cluster. You want some of your natural lashes visible between the clusters.
For a full-volume look: place clusters tightly together with minimal spacing. This builds density quickly but takes more lash clusters.
Press to Secure
After placing each diy lash cluster, use the tail end of your tweezers to gently press the base against your natural lashes. Hold for about three seconds. This pressing step ensures the glue makes full contact with your natural lash base and removes any tiny gaps that could cause lifting later.
I used to skip this because it felt redundant. Then one humid afternoon, I watched my un-pressed clusters start peeling off one by one during an outdoor lunch. The pressed ones stayed. Three seconds of pressure per cluster. Worth it.
Blend and Seal
Once all your clusters are in place, take your eyelash curler and gently clamp your natural and false lashes together. This merges them into a single, unified lash line rather than two distinct layers. It's the difference between "nice lashes" and "are those real?"
After curling, apply a coat of lash sealant over the bonds. The sealant adds a protective layer that resists water and oil — the two things that dissolve lash glue fastest. I apply sealant to both the top and underside of my lash line for full coverage.
Three Things I Wish Someone Had Told Me Sooner
I recommend heat bond bands cluster lashes for beginners. They're thinner, more flexible, and easier to shape around your lash line than cotton thread bands diy lash extensions. The learning curve is gentler. You can always graduate to cotton thread once you've built confidence.
For sensitive eyelids, cotton thread bands at home lash extensions are your friend. The soft cotton is gentler on the skin and less likely to cause irritation during long wear. I recommended these to my sister, who has reactive skin, and she went from "I can't wear falsies" to wearing them all the time.
If you want a lifted, cat-eye effect, add one or two extra clusters at the outer corner. Just one or two. It's a small adjustment that changes the entire energy of the look without requiring a different lash style. I do this almost every time I apply them now — it's become automatic.
My left eye still gives me trouble sometimes — the outer corner always wants to lift, and I end up pressing it twice. But compared to three years ago, when I sat in front of the mirror for forty-five minutes and still walked out looking like I'd lost a fight with a craft store? The progress is real.
We recommend PBT heat bond band lash clusters for sensitive eyes. And for the love of everything, wait for your glue to turn tacky.
The rest is just practice. Messy, occasionally frustrating, occasionally caterpillar-looking practice. But you'll get there.
P.S. — The worst cluster lash fail I ever had was right before a first date. I'd watched one tutorial and thought I was ready. I was not ready. I showed up with one eye significantly fluffier than the other, and spent the entire dinner hyperaware of my left lid. He didn't mention it. I still don't know if he didn't notice or was just being polite. Either way, I went home and practiced for another three weeks before attempting them in public again.
Do you know how to apply cluster lashes?
Frequently Ask Questions:
Q: How long do cluster lashes last?
A: Most customers said our reusable clusters lashes can last about 10 days.
Q: Can cluster lashes damage natural lashes?
A: No. Our lash bond and seal are genlte and safe. It won't damage natural lashes.
Q: How many clusters per eye?
A: Usually 3-5 lash clusters is popular.
Q: Can I sleep with cluster lashes?
A: Yes, this cluster lashes can last for a long time. You can sleep with it.